WPHelpere Documentation
WooCommerce product import
If you want to import woocommerce products, then select "Multiple" option products option. If you just have a single product and just want to show only the Knowledgebase categories in the front page of the Knowledge base system, you can select "Single". Note that if you want to reconfigure the Product type, all products and categories created will be deleted in order to prevent mis-configuration and confusion. So be sure to wise decide the type you want to setup. Once you are done with the setup. Click on Proceed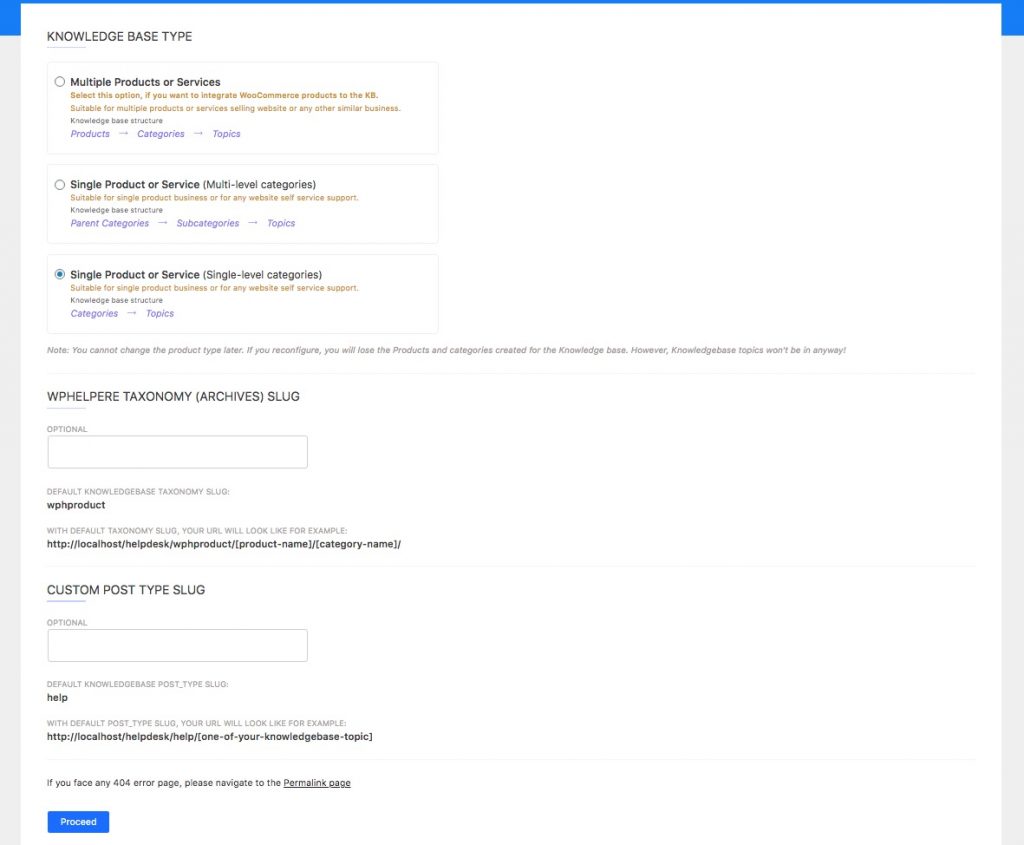 That's it. Your Knowledge base is Ready for creating topics.
You can start customizing and adding topics to your Knowledge base.
That's it. Your Knowledge base is Ready for creating topics.
You can start customizing and adding topics to your Knowledge base.
Products Setup
Setting Up Products for the Knowledge base Its a simple easy way to setup the products. Goto WPHelpere > Products Add the Product name and choose your product image preferably rectangular size with same size for all your images to get perfect alignment. Click Add New Product You can create multiple products in the same way. Note: Even if you have selected "Single" mode in the WPHelpere setup you have to create one product in order to create categories and topics. You can assign that product to all your categories and topics.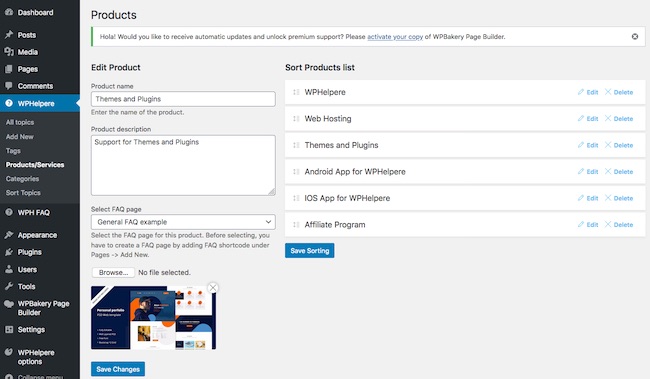
Categories Setup
Goto WPHelpere > Categories Add the Category name and category icon. Click Add New Category to create the category. You can create multiple Categories in the same way.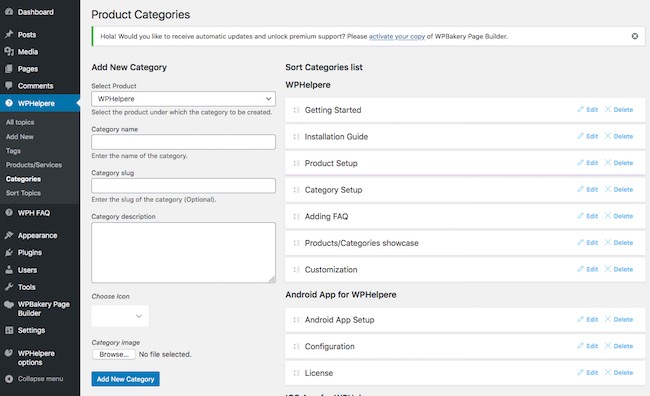
Start creating Topics
To create a Topic simply follow the below steps- Go to WPHelpere > Add New
- Enter the topic title .
- Select the product to which the topic belongs to and add categories and tags to the topic.
- Finally click Publish.
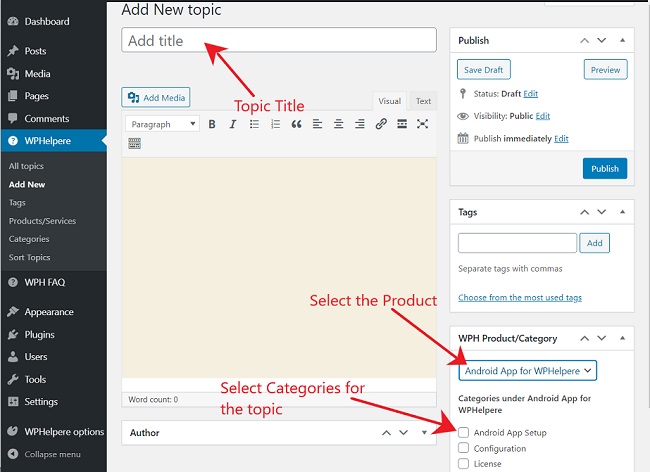 Hurray! Your new topic is created and published.
Showcasing Products on Front page
To showcase the products on front page, Create a new page and put a unique title to the page for example "WPH Products" and select WPH Display Products Page template under "Page attributes on the right hand side as shown in the screenshot. And publish the page.
Showcasing Categories on Front page
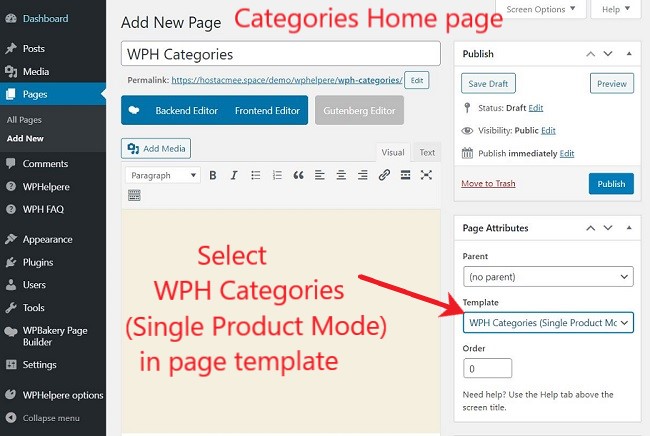
Only for Single product setup mode. To showcase the categories on front page Create a new page and put a unique title to the page for example "WPH Categories" and select WPH All Categories Frontpage Page template under "Page attributes on the right hand side as shown in the screenshot. And publish the page.If you're using the system in Multiple product mode, then this step is not needed. It means, you don't need to create front page for categories
because system will show the selected categories automatically when clicking a product on the front page.
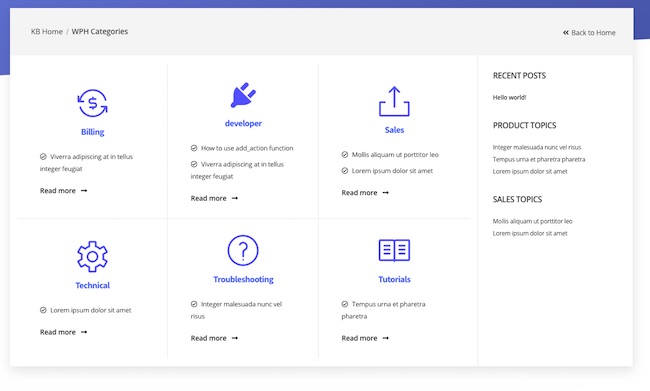
 Your preview will be like as shown below.
How to Add FAQ?
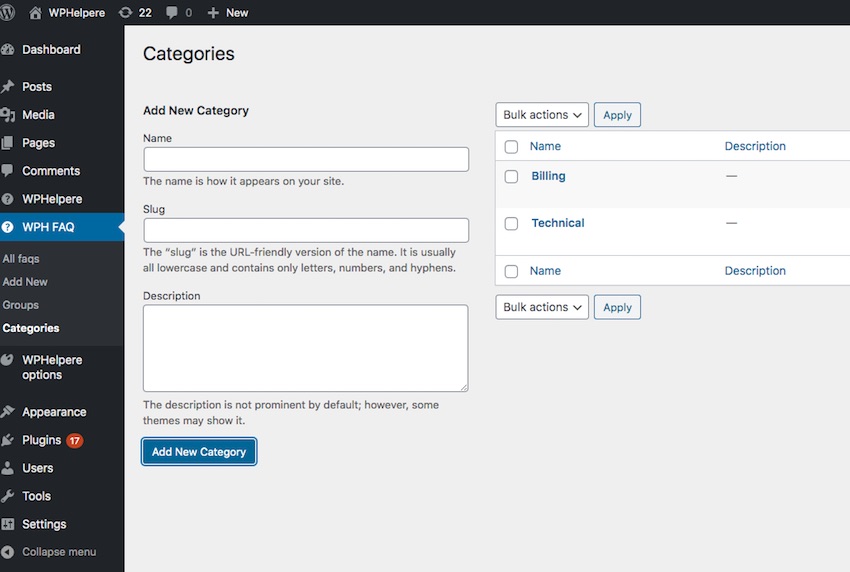
With WPHelpere, you can create any number of FAQs with different categories To add a New FAQ follow the below steps Goto, WPH FAQ > Groups Creating Groups is mandatory to insert FAQs in to any WordPress page. For example you can create separate groups for separate products (if you have multiple products). Creating atleast one group is required to insert FAQ shortcode in to a WordPress page.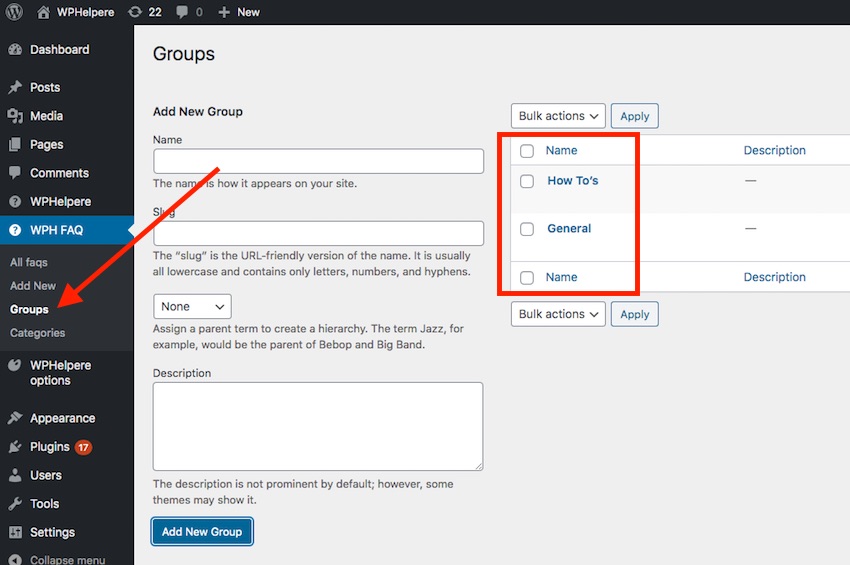 Then, WPH FAQ > Categories
Here, you can create a multiple categories that matches to your FAQ and assign to each FAQ. Category selection is optional.
Then, WPH FAQ > Categories
Here, you can create a multiple categories that matches to your FAQ and assign to each FAQ. Category selection is optional.
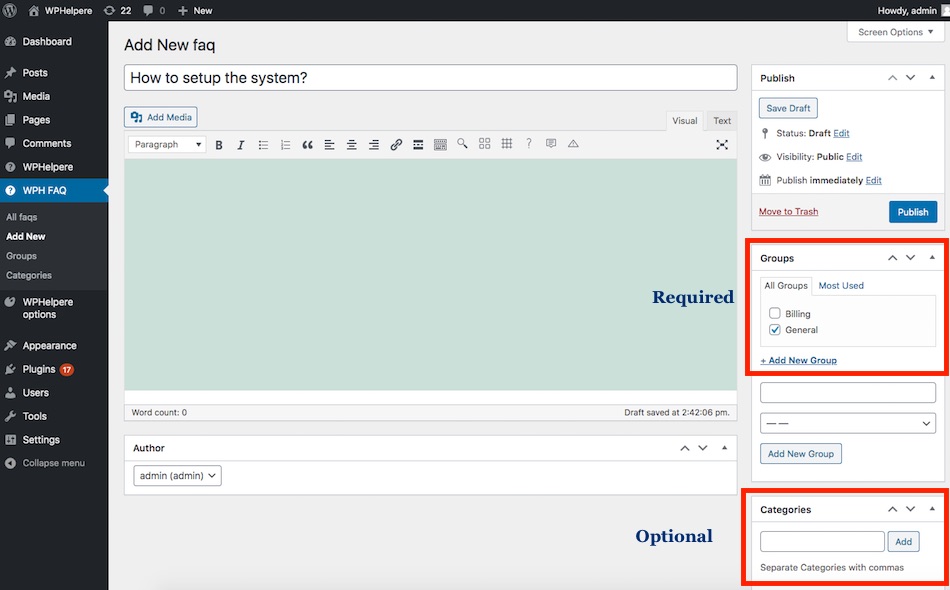
 Post your question in title box and answer in the content box
Select a category and the product for your question as shown in the screen shot.
Publish your page.
Post your question in title box and answer in the content box
Select a category and the product for your question as shown in the screen shot.
Publish your page.
Create FAQ pages using FAQ shortcodes
You can insert FAQ groups in any WordPress page using WPH FAQ shortcode or using shortcode manager. Below is screenshot reference to use shortcode manager to insert WPH FAQ group.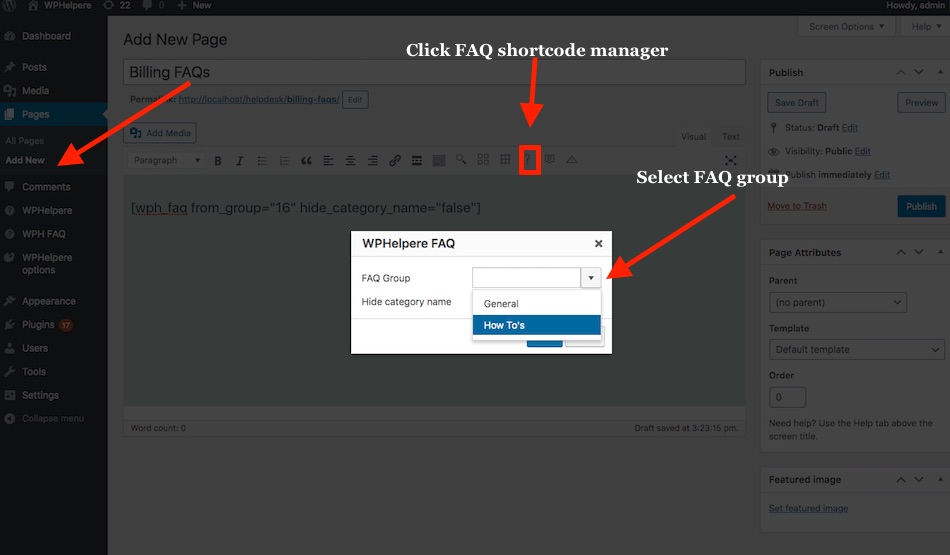 A default shortcode would be similar to the one
[wph_faq from_group="16" hide_category_name="true"]
Add navigation to FAQ pages for Multiple products setup
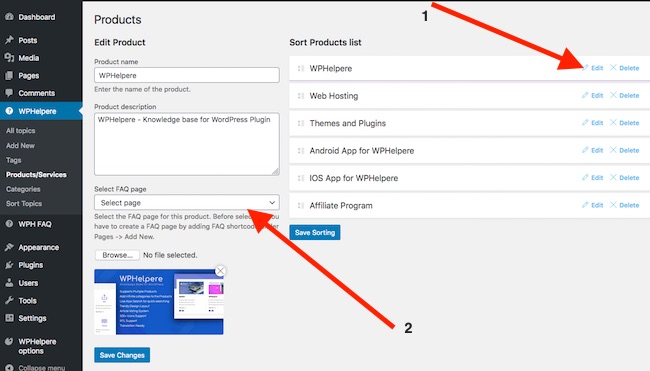
In Multiple products setup, you can also create navigation to each product FAQ by following the instructions given below- Once you have created the FAQ pages as mentioned in "Create FAQ pages using FAQ shortcodes" section, navigate to WPHelpere -> Products/Services
- Edit the Product or service that you want to add navigation to the FAQ page, you will see an option at the bottom to select a page.
- Select the FAQ page that you have created for this product and click save. That's it.
 Once you publish the page, you will get an url. Copy the url and paste it in WPHelpere > Products. Enter products FAQ url. as mentioned below.
How to create a Documentation for your products or Services?
With WPHelpere, you can create any number of Documentation for your products or Services and link the documentation to the product or service that you want to tag to.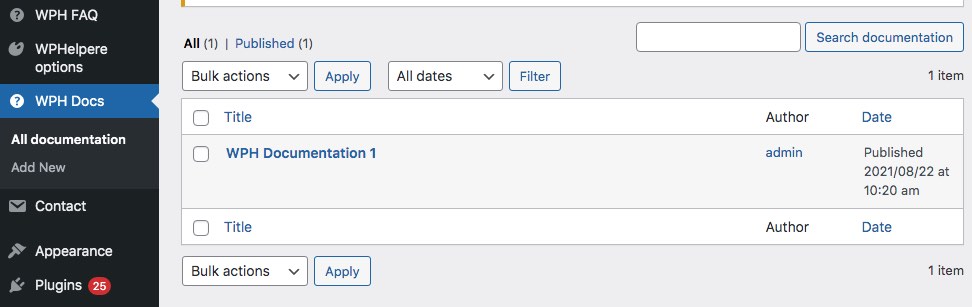

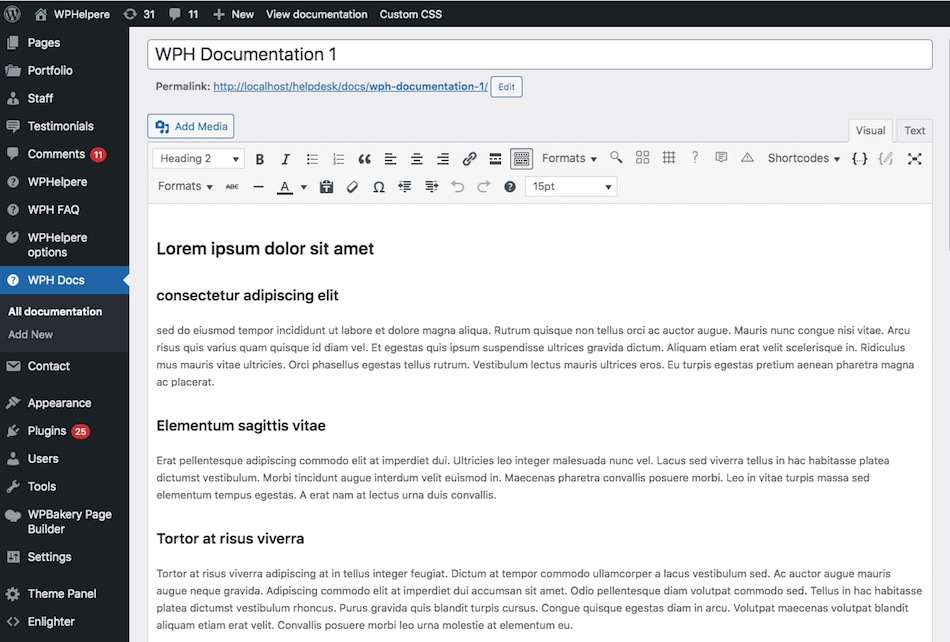
How to add contents to a documentation post?
Create the documentation post by adding headings like h2 or h3 followed by your description to each of the headings. The headings are required to create automatic navigation on the left sidebar for quicker navigation. The documentation post can be created by the following headings and paragraph content for example.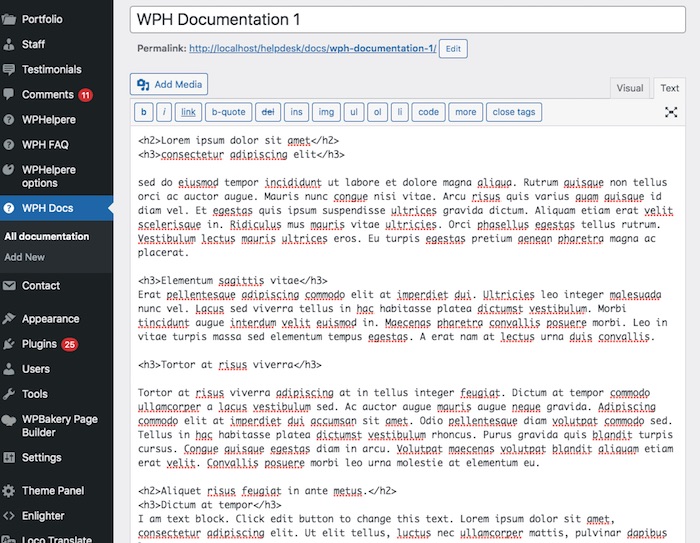
 That's it!
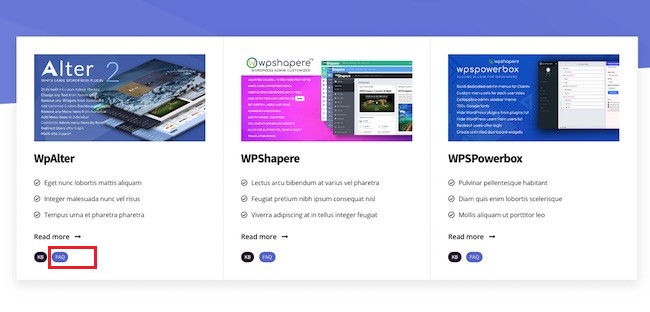
Linking a documentation post to a product or service buttons
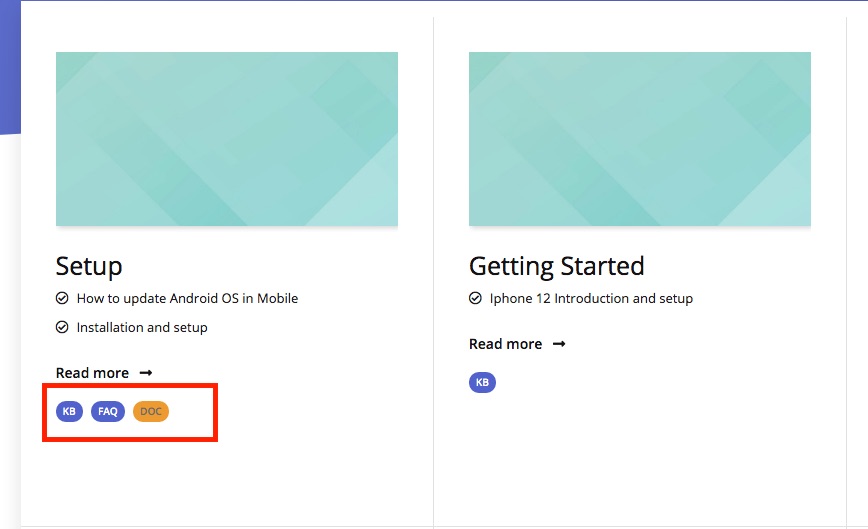 WPHelpere products layout can show buttons linking to KB, FAQ and Documentation for each products or services.
Note: This is optional and you can disable these buttons in the WPHelpere options and add the links to your theme navigations of any location if you don't want these buttons.
WPHelpere products layout can show buttons linking to KB, FAQ and Documentation for each products or services.
WPHelpere products layout can show buttons linking to KB, FAQ and Documentation for each products or services.
Note: This is optional and you can disable these buttons in the WPHelpere options and add the links to your theme navigations of any location if you don't want these buttons.
WPHelpere products layout can show buttons linking to KB, FAQ and Documentation for each products or services.
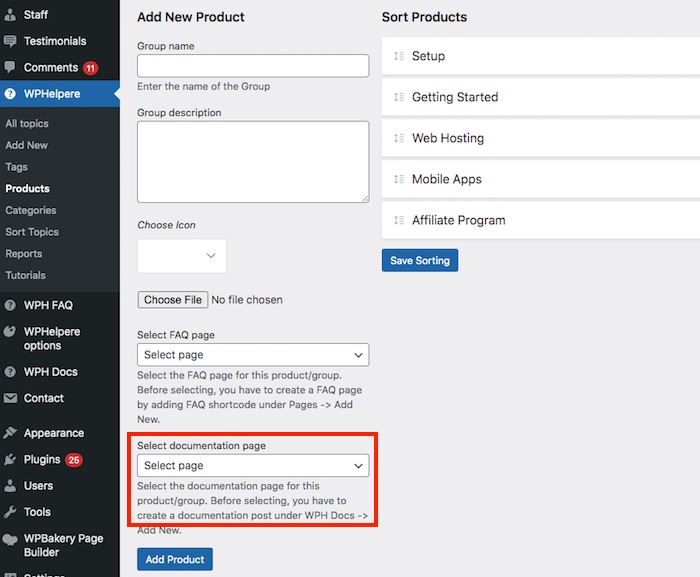
- Navigate to WPHelpere > Products > Edit a product or service that you want to link the documentation post to.
- Scroll down to the bottom and you will see selection box "Select documentation page" and select the documentation post from the list.
- click Save changes.
General Options
You can customize general options such as width of the KB theme, text colors, anchor tags, etc You can also hide/show the breadcrumb under this settings.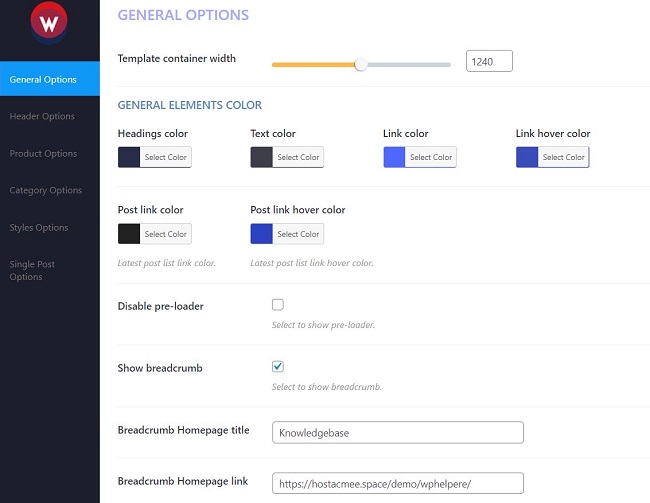
Header Options
From Header settings you can customize Top bar elements and Main header elements. Like Heading Title , Descriptions, etc., This option helps you to change the header background image and the color settings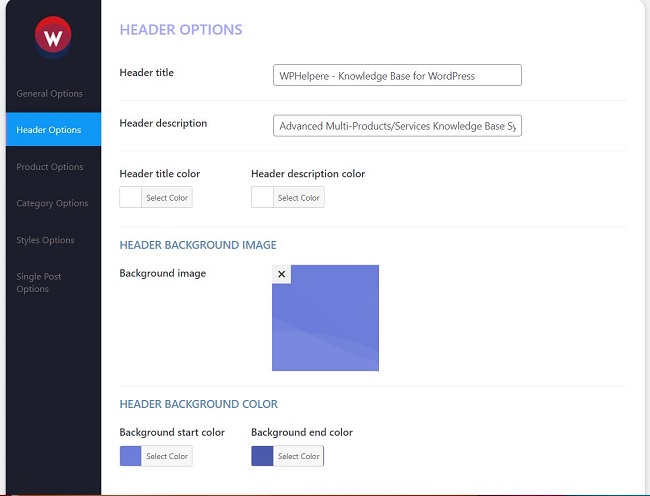
Product Options
From Product Options you can customize your product styles.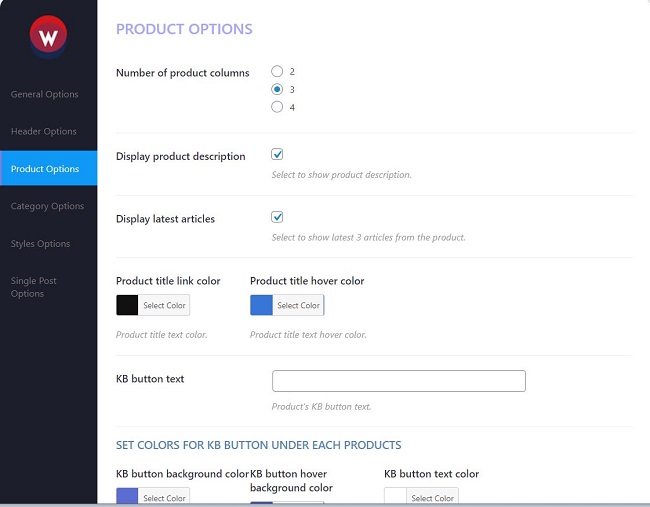
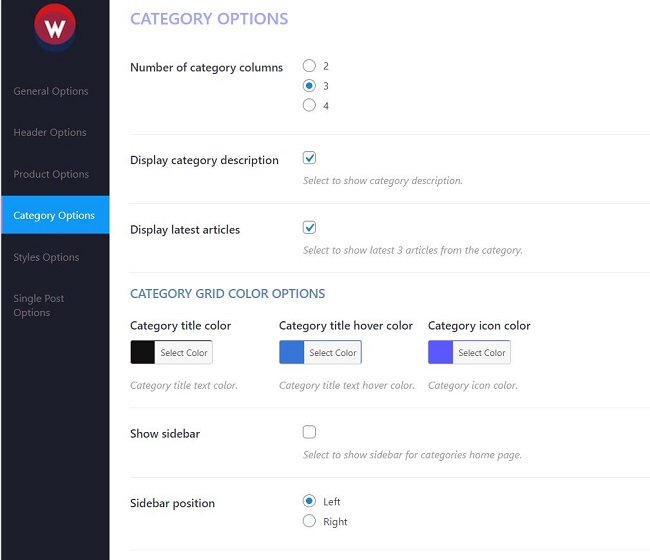
Category Options
From Category Options you can customize your category styles.