WPShapere
Wordpress Admin Theme Customizer and Styler plugin
- created: 25/06/2014
- by: AcmeeDesign Softwares and Solutions
- Have questions? Please head to Our Knowledge base at https://kb.acmeedesign.com/kbase_categories/wpshapere/
- For Queries please open ticket at https://envato.acmeedesign.support
Thanks for purchasing WPShapere!
If you have any questions that are beyond the scope of this help file, please feel free to please a open ticket at http://acmeedesign.com/support/.
Please provide us your admin login details for faster support. Thank you!
Getting Started
WPSHAPERE is a WordPress plugin and a powerful tool to customize the WordPress Admin theme and elements. By using WPSHAPERE you can white lable the WordPress admin section and brand it as your own software. This plugin doesn't requires any programming knowledge as it has simple to use and powerful user interface to customize the look and feel of the admin theme.
You can install the plugin in 3 simple steps.
- Open the folder /Plugin-files/ and copy the entire folder named WPShapere and paste inside the plugins folder i.e, yourdomain.com/wp-content/plugins/.
Make sure that you aren't copying the entire folder "Plugin-files". - Then login to the admin section and navigate to plugins page. You can see our plugin name WPSHAPERE in the plugins list if you placed the plugin folder in the correct location as mentioned in Step 1.
- Click the Activate link next to the plugin name.
That's it.
Once the plugin is activated, you can see the entire look of the admin theme have been changed to our plugin's default color scheme. Also you can see a list of new menus have been created in the admin menu list from which you can customize the colors and elements of the admin theme as your wish.
Product activation
After installation, the plugin will ask you to enter your purchase code. Find your purchase code from the license file and enter the code. That's it. You can start customizing the admin theme.
How to find your purchase code?
Customization
Basically the customization settings have been grouped as
- General Options
- Login Options
- Dashboard Options
- Admin bar Options
- Admin pages Options
- Footer options
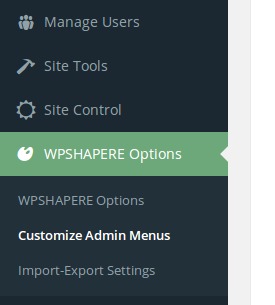
- Customize Admin Menu
You can access these settings in the WPSHAPERE Options page.
General Options
Customize Admin Elements
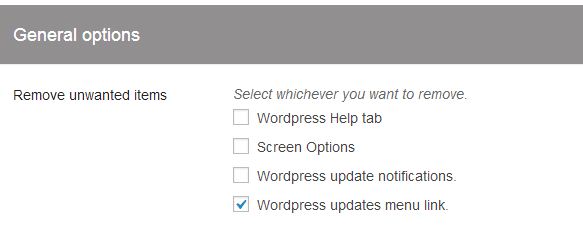
You can remove admin elements which will expose the name of Wordpress like WordPress Help tabs, Screen options and WordPress notifications.
To remove any elements, select the appropriate checkbox and save.
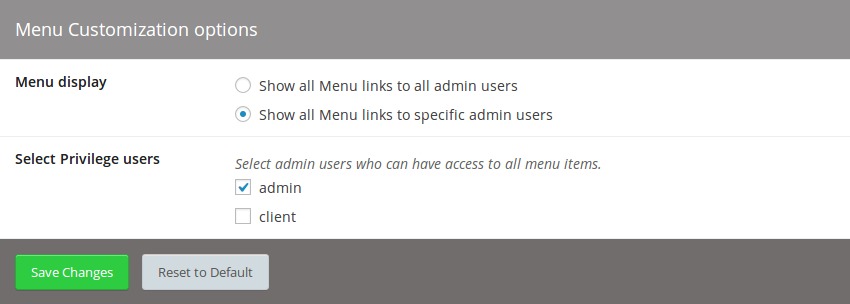
Privilege Users(New - since v2.0.4)
Using the Privilege users option, you can define a set of users who can see all menu items of WordPress admin menu.
Note: Only administrator roles can be set as privilege users.
Button colors
You can customize WordPress Button colors of both primay & secondary buttons. You need to set colors for both status, i.e. for normal and for hover event.
Login options
From this option page you can customize the look of the WordPress default login page
- Set your desired background color
- Set Background image of a big size or as a texture image. In case of texture image you can repeat it by selecting the option "Background repeat".
- Set custom form background colors and text colors.
- If you want transparent form background, then select the option "Transparent Form".
- Upload your own logo and specify the logo width and height.
- Set custom url to your logo.
![]()
Also you add more custom css styles to the login page by adding your styles to the Custom CSS textbox
Once you made all your changes, don't forget to save your changes.
You can Reset back to the plugin's default settings whenever you want by clicking the Restet to defaults button.
Dashboard options
Here you can add or remove WordPress default widgets.
To Remove any unwanted widgets, select the appropriate checkbox and save the options.
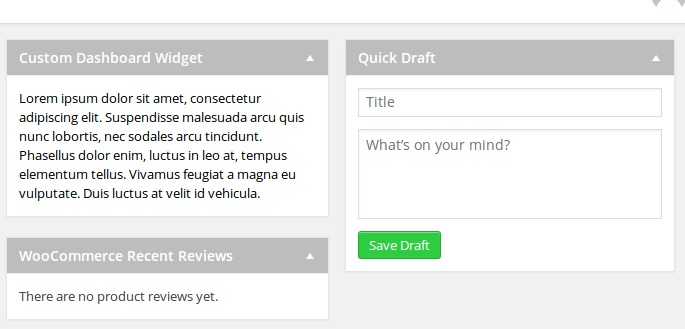
Also you can add custom dashboard widgets by adding your own contents. You can add up to 4 widgets to the admin dashboard.
The plugin will support Text and image contents we well as RSS feed contents.
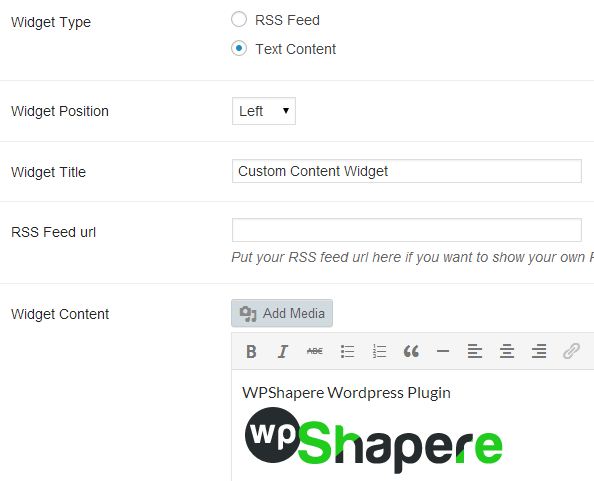
How to add Text Contents Widgets
- Navigate to dashboard tab and scroll down to "Create widgets section".
- Select widget type to "Text content".
- Select desired position that could be either left or right.
- Set Widget Title.
- Add your contents in to the WYSWYG editor. Leave the "RSS feed url" field empty.
- Once you construct your contents, Save it.
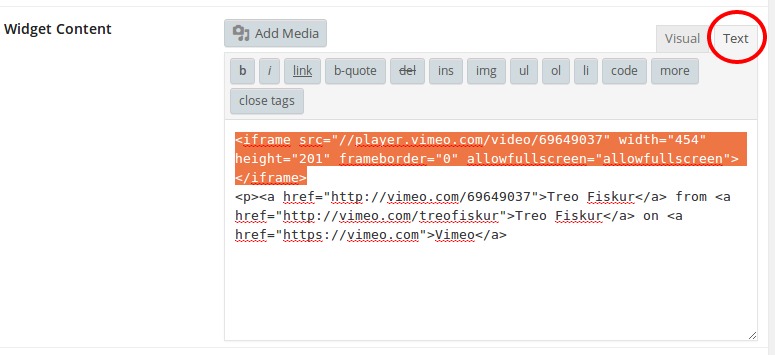
You can also insert any html contents for example you can insert an Youtube or Vimeo video iframe codes. To insert html codes correctly, you need to switch to "Text" mode of the editor like shown below.
How to add RSS feed widget
- Navigate to dashboard tab and scroll down to "Create widgets section".
- Select widget type to "RSS feed".
- Select desired position that could be either left or right.
- Set Widget Title.
- Set a valid RSS feed url, example: http://domain.com/feed.
- Once you construct your contents, Save it.

Likewise you can add up to 4 different widgets.
AdminBar Options
You know you can upload a seperate logo for admin section other than the login page. This will be used in case if you do a WordPress theme for your client, you can add your logo to the login page and add your client's logo inside the admin section.
After you upload the logo, you can adjust vertical position of the logo by moving top or bottom by using the Move Slider tool. This will be used in case of logo position do not matched the menu position.
Well, you can remove unwanted menus from the admin bar. Just you need to select the appropriate checkboxes options that you want to remove.
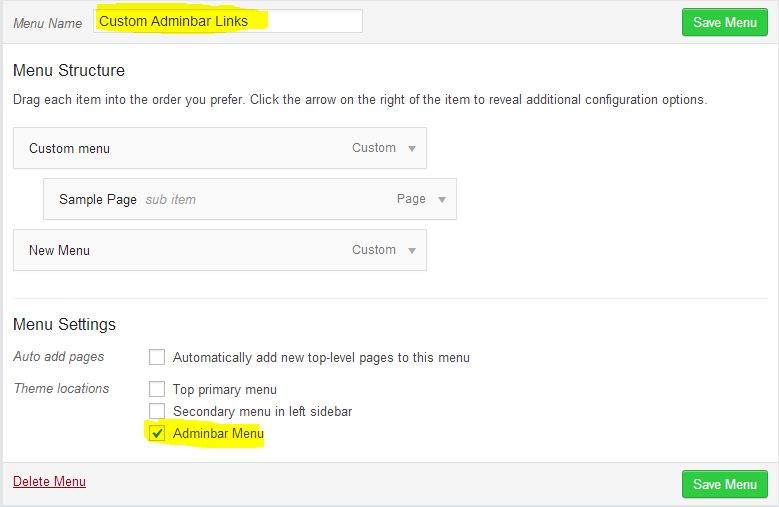
As a Notable feature you can add custom menu links to the admin bar. You can add admin bar menus from the WordPress default menu creation page.
To do this, go to Appearance -> Menus.
There you can see a new Menu location created inside the menu creation tab.
Then create a new menu by setting a menu name for example "Admin bar links" and select the location "Admin bar menus" and save.
Now you can create any number of menu links and add them to admin bar.
Admin pages options
From this page you can customize the colors and elements of the WordPress Admin pages.
To change background color, pick your desired color from color picker of the Background color Option. Like wise you can change the
- admin menu background color.
- Menu links color.
- Menu link hover color.
- Active link color.
- Link text colors.
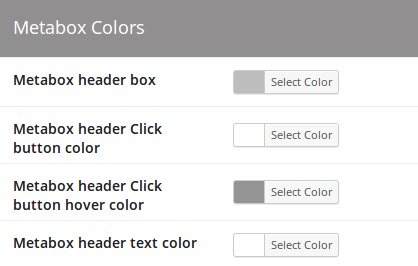
You have the option to customize the WordPress meta box colors by changing the below settings.
Footer Options
Footer Options
Once you activate the plugin, wordpress default text and links will disappeared by the plugin and so you can add your desired content in to the footer area.
You can use the WYSWYG editor to add the footer content. You can add any contents like Texts, images, links, etc.
Customize Admin Menu
Another notable feature of this plugin is the ability to remove unwanted menu links and re-order (Custom order) the main admin menu links.
To do that navigate to "Customize Admin Menu" which is located under the main top level menu of WPSHAPERE options menu.
In that page you can see the list of all available admin menu links.
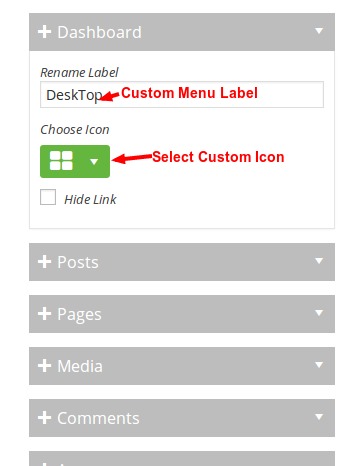
To remove any of the admin menu links, select "Hide" check box of menu link that you want to hide. If you want to show all menu items to admin and want to show limited menu items to users other than admin users, you can achieve that by selecting the option "Show all Menu links to admin users" in General options page.
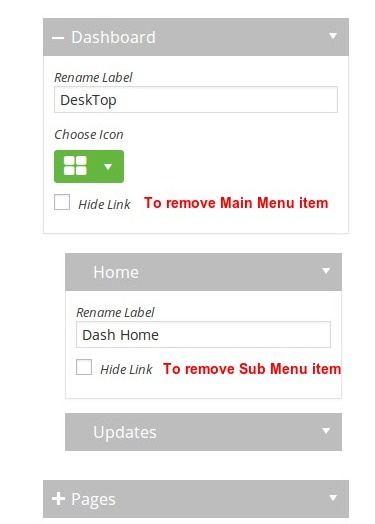
To change the order of the admin menu links, drag the items up or down and drop menu items.

That's it.
You need to click save button in order save the changes.
Also you can reset the customization at any time by clicking the "Reset Customization" button. Note: This will erase all menu customization settings from the database.
Multi-Site Options
WPShapere plugin will also supports WordPress Multi-site installation. In Multi-site installation, you can let your network blog admins to have their own Admin Panel customizations
or You (as Network Super Admin) take control over all network blogs admin panel customizations (Global Customization)..
By default, Global customization have been enabled. If want to allow other blog admins under your network to customize the admin area by themselves delete or comment the following codes in
/wpshapere/wpshapere.php
if(is_multisite())
define('NETWORK_ADMIN_CONTROL', true);
Import and Export Settings
You can export your customized settings to your local computer as a backup file and whenever you want, you can restore to your customized settings by importing the exported settings backup file.
These options can be found in WPSHAPERE options -> Import-Export Settings
That's it! Once again Thanks for purchasing Our Product and if you have any queries or questions that is beyond the scope of this help file feel free to contact us at https://envato.acmeedesign.support or ask in the comment section of the CodeCanyon site.
Please take few minutes to Rate our Script

If you like our script and find it very useful, please take a few minutes of your valuable time to Rate 5 star to our script at CodeCanyon.net
If you are not satisfied with our script, please email us your queries or feature request to support@acmeedesign.com and we will try our best to help you with your request.
Thanks a Lot again!